
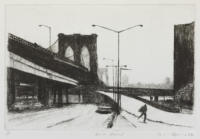
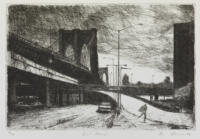
I. 1st state of 8, 1997
V. 5th state of 8, 1997
VI.a. 6th state of 8, 1997
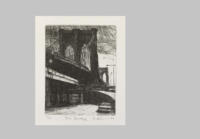
VII.c. Artist’s proof of 7th state of 8, 1997

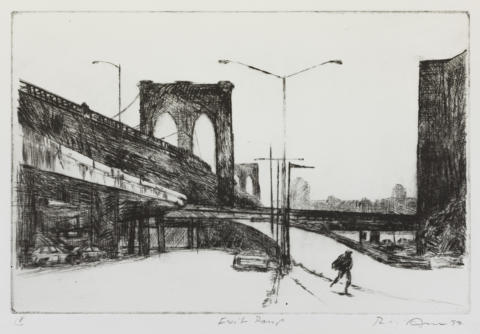
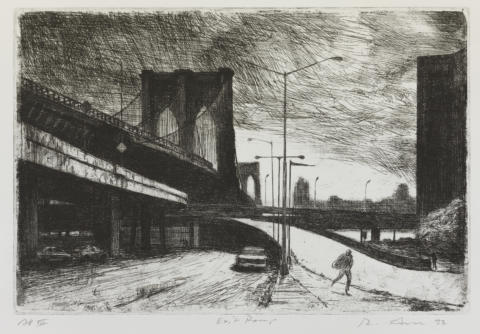
Edition impression (first edition, 1997) (Featured Image)
Edition impression (second edition, 2001), as The bridge
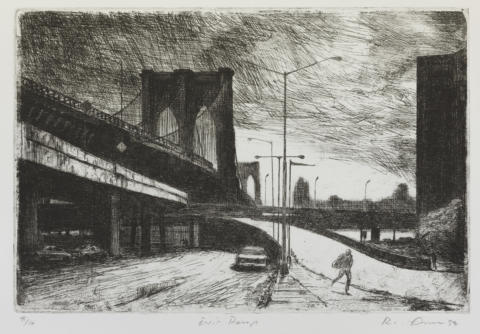
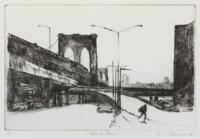

E.108 Exit ramp 1997; reworked and retitled 2001
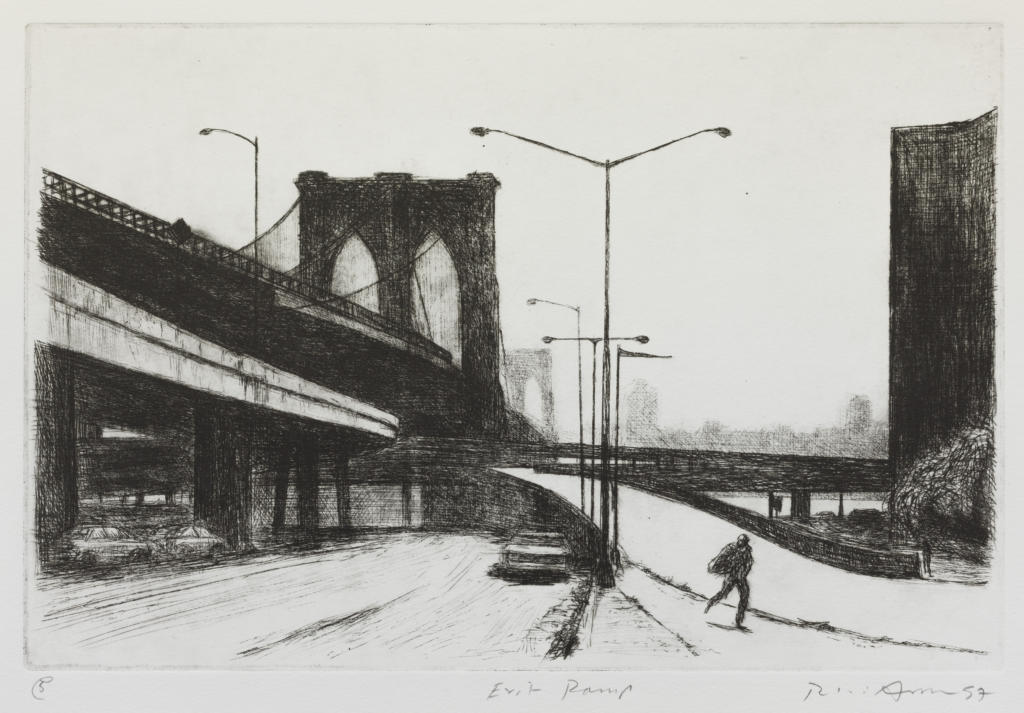
I. 1st state of 8, 1997
Drypoint. A view, in reverse, of the Brooklyn Bridge, New York, from Robert F. Wagner Sr. Place in Lower Manhattan, looking towards Brooklyn. An access road, lined with street lights, curves into the right corner; a man walks along the path beside this road. At the left, under the bridge, are parked cars, and there is also a car at the lower centre, to the left of the access road. At the lower right, just beyond a tall building, is a glimpse of the East River, above which rises the Brooklyn skyline. The sky is blank. Scored in pure drypoint, the composition has been rendered sketchily but includes all of the main details seen in the seventh state of the print (that is, before the plate was cut down and the work retitled).
Cleanly wiped impression on wove paper, printed by Rick Amor in his Alphington studio. Inscribed in pencil, below the plate mark: lower left: ‘1 [circled]’; lower centre: ‘Exit Ramp’; lower right: signed and dated ‘Rick Amor 97’.
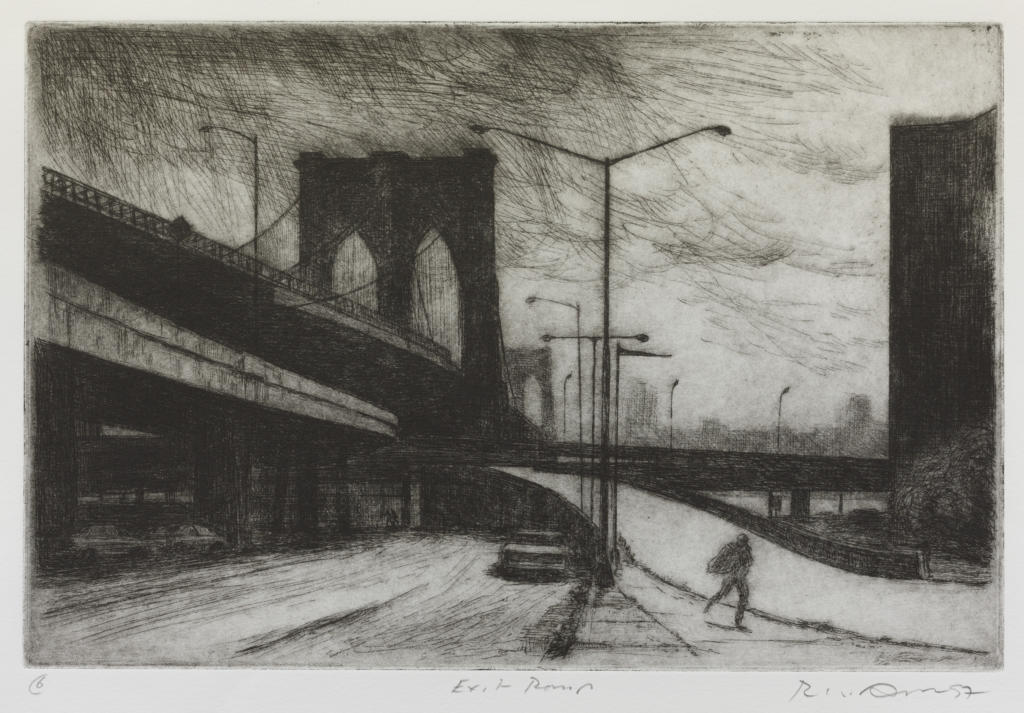
V. 5th state of 8, 1997

The sky in the vicinity of the nearer bridge tower has been scored with vertical lines, which are visible through the tower’s two pointed arches and beneath the cable at left. The buildings on the skyline have been lightly burnished and their outline is no longer sharp.
Impression on wove paper, printed by Rick Amor in his Alphington studio. Inscribed in pencil, below the plate mark: lower left: ‘5 [circled]’; lower centre: ‘Exit Ramp’; lower right: signed and dated ‘Rick Amor 97’.
VI.a. 6th state of 8, 1997
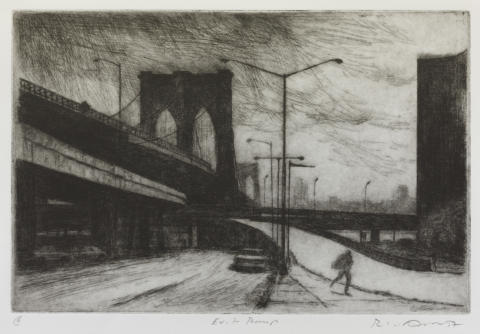
The sky is now full of etched billowing clouds. On the lower roadway, directly below the nearer bridge tower, a tiny pair of figures has been introduced. A small area of irregular strokes of shading now appears in the lower right corner of the footpath. There are six variant impressions of this state.
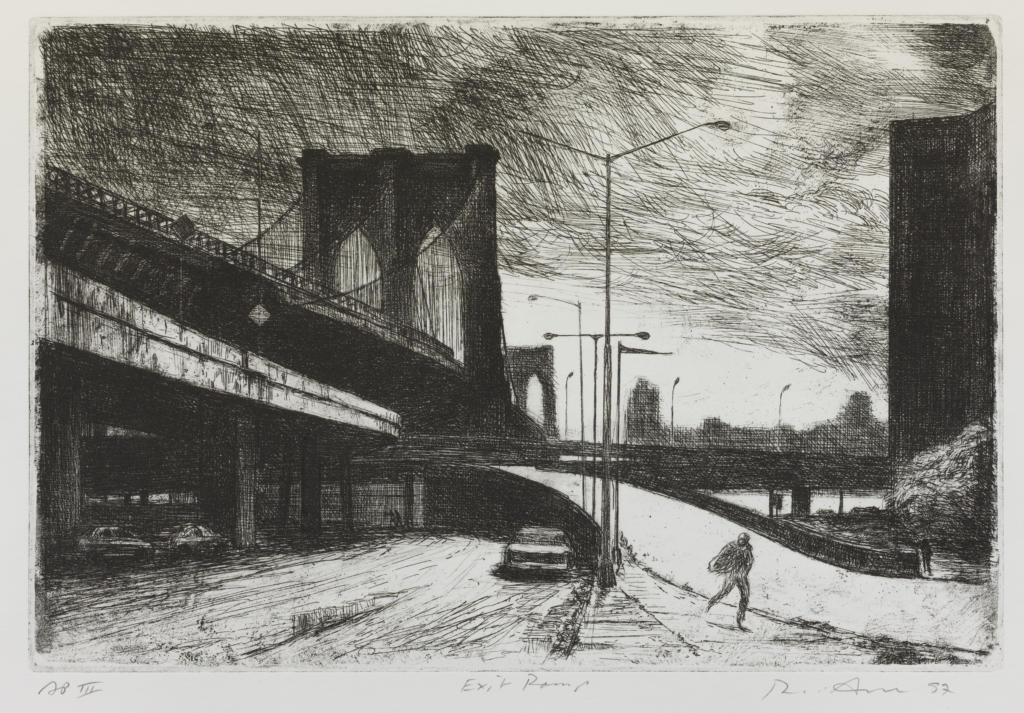
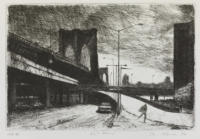
VII.c. Artist’s proof of 7th state of 8, 1997
More etched work has been added: to the sky, to the road at the left, and to the car at the lower centre. The silhouetted buildings on the horizon, the distant bridge tower and areas of the foreground have been covered with etched cross-hatching. The vertical shading visible through the open arches of the nearer bridge tower is now stronger and denser. There is clear evidence of foul biting, but this is harnessed to good atmospheric effect, as, for example, in the radiance suggested around the street lamp at the upper right. There are eight variant impressions of this state.
Edition impression (first edition, 1997) (Featured Image)
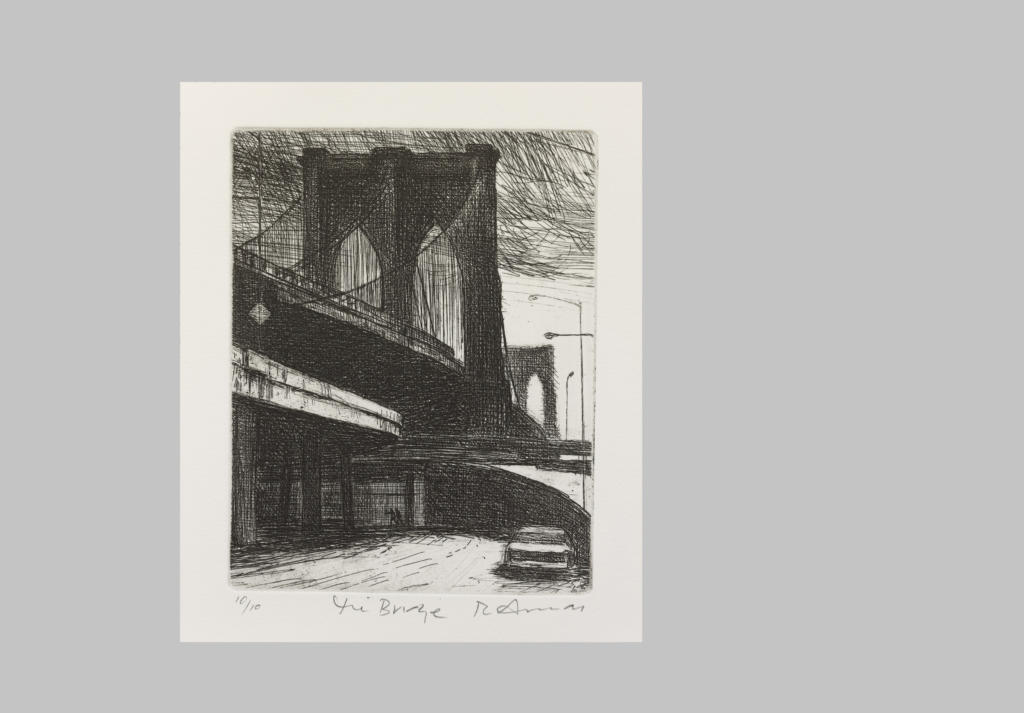
Edition impression (second edition, 2001), as The bridge

On 17 May 2001 the plate was cut down on all sides, to create a vertical composition. The nearest street lamp was burnished away. The focus is no longer on the bridge’s span across the East River, but on the nearer bridge tower, with its neo-Gothic arches, and on the understorey. The matrix now measures 157 x 124 mm, and the work has been retitled The bridge.
Drypoint. A view, in reverse, of the Brooklyn Bridge, New York, from Robert F. Wagner Sr. Place in Lower Manhattan, looking towards Brooklyn. An access road, lined with street lights, curves into the right corner; a man walks along the path beside this road. At the left, under the bridge, are parked cars, and there is also a car at the lower centre, to the left of the access road. At the lower right, just beyond a tall building, is a glimpse of the East River, above which rises the Brooklyn skyline. The sky is blank. Scored in pure drypoint, the composition has been rendered sketchily but includes all of the main details seen in the seventh state of the print (that is, before the plate was cut down and the work retitled).
The sky in the vicinity of the nearer bridge tower has been scored with vertical lines, which are visible through the tower’s two pointed arches and beneath the cable at left. The buildings on the skyline have been lightly burnished and their outline is no longer sharp.
The sky is now full of etched billowing clouds. On the lower roadway, directly below the nearer bridge tower, a tiny pair of figures has been introduced. A small area of irregular strokes of shading now appears in the lower right corner of the footpath. There are six variant impressions of this state.
More etched work has been added: to the sky, to the road at the left, and to the car at the lower centre. The silhouetted buildings on the horizon, the distant bridge tower and areas of the foreground have been covered with etched cross-hatching. The vertical shading visible through the open arches of the nearer bridge tower is now stronger and denser. There is clear evidence of foul biting, but this is harnessed to good atmospheric effect, as, for example, in the radiance suggested around the street lamp at the upper right. There are eight variant impressions of this state.
On 17 May 2001 the plate was cut down on all sides, to create a vertical composition. The nearest street lamp was burnished away. The focus is no longer on the bridge’s span across the East River, but on the nearer bridge tower, with its neo-Gothic arches, and on the understorey. The matrix now measures 157 x 124 mm, and the work has been retitled The bridge.
- Catalogue Number
- E.108
- Title and Date
- Exit ramp
1997; reworked and retitled 2001
- Subsequent Title(s)
- The bridge
- Description of Featured Image
- A view, in reverse, of the Brooklyn Bridge, New York, from Robert F. Wagner Sr. Place in Lower Manhattan, looking towards Brooklyn. An access road, lined with street lights, curves into the right corner; a man walks along the path beside this road. At the left, under the bridge, are parked cars, and there is also a car at the lower centre, to the left of the access road. At the lower right, just beyond a tall building, is a glimpse of the East River, above which rises the Brooklyn skyline. In 2001, the matrix for the print was cut down and reworked, and the work was retitled The bridge (see cat. no. E.108.1).
- Where Made
- Alphington, Melbourne
- Medium Category and Technique
- Intaglio Print: Drypoint, etching and foul biting on copper
- Support
- Wove paper. Identified papers: Buff BFK Rives paper with watermark: ‘BFK RIVES / FRANCE’ with infinity symbol; white Hahnemühle paper with watermark: cockerel within a circle; white Magnani Acqueforti paper with watermark: Romanesque ‘M’ with cross above.
- Dimensions
-
Image size: 217 x 328 mm
Matrix size: 157 x 124 mm - Artist’s Record Number
- RAE.114 (1997), RAE.118 (1997), RAE.140 (2001)
- Printer(s) and Workshop(s)
- States I through VII, and first edition, printed by Rick Amor in his Alphington studio (Exit ramp). State VIII printed by Amor in the Alphington studio (The bridge). Second edition printed by Martin King at the Australian Print Workshop, Fitzroy (Melbourne) (The bridge).
- Summary Edition Information
- Eight states. Two editions. First edition: edition of ten numbered impressions, 1997 (Exit ramp). Second edition (printed after plate cut down): edition of ten numbered impressions, 2001 (The bridge).
- Literature
- For commentary on Amor’s representations of the Brooklyn and West Gate bridges, see Gary Catalano, The Solitary Watcher: Rick Amor and His Art, Melbourne University Press, Carlton South, Victoria, 2001, p. 130.
- Collections
- State Library of Victoria, Melbourne: eleven state impressions, numbered 1 through 11, all dated 1997 (Exit ramp); AP III, dated 1997 (Exit ramp); ed. 8/10, dated 1997 (Exit ramp); one state impression, numbered 1-1, dated 2001 (The bridge); ed. 10/10, dated 2001 (The bridge).
- National Gallery of Australia, Canberra: ed. 3/10, with plate tone, dated 1997 (Exit ramp) (2007.626); APW workshop proof 2/2, on buff paper, dated 2001 (The bridge) (2002.431.832).
- Comment
New York’s neo-Gothic Brooklyn Bridge, with its two massive towers, was completed in 1883, and was at that time the world’s longest suspension bridge. A feat of civil engineering, it is a designated National Historic Landmark. This etching is based on a gouache and watercolour study of the bridge as viewed from Robert F. Wagner Sr. Place in Lower Manhattan – a location that attracted Amor for its ‘appealingly desolate’ character – looking towards Brooklyn. The composition in the gouache has been reversed in printing.
Catalano (2001) compared Amor’s renderings of the Brooklyn Bridge with his depictions of Melbourne’s West Gate Bridge, noting that while the artist shows both structures in all their monumentality, the Brooklyn Bridge, unlike the West Gate Bridge, is always depicted within the context of the city. Nevertheless, four years after Amor had worked the present print through seven states – and after he had also produced a second, slightly larger version of his composition (cat. no. E.109) – he decided to return to this work. In 2001 he cut down its matrix and took the print to an eighth state, in which the focus of the image was entirely on the bridge, to the exclusion of its context (cat. no. E.108.1). The decision to cut down the plate stemmed from Amor’s dissatisfaction with the scale of the bridge in the horizontal version of the composition: he thought that the structure did not look sufficiently monumental. By reducing the plate so that the bridge became the focus of the image, he imbued the motif with greater scale and grandeur.
E.108 is the first of Amor’s intaglio prints depicting New York subjects and was made following his residency at the Australia Council’s Greene St Studio in 1996. The image has a large number of drawn and painted variants, some of them closely resembling one another.
- Keywords
- Bridge, Brooklyn Bridge, New York
- URL
- https://catalogue.rickamor.com.au/works/intaglio/exit-ramp/
Record last updated 16/02/2021